
 Image Objects
General Comments on Images
A web page with several multi-media components is stored across several
files. Composer saves HTML files and their
images in the same directory, unless instructed otherwise. For
an image used on different pages, this means the image has copies scattered
about a web site. For basic web sites this is a reasonable strategy:
the cost of extra file space is minimal compared to the maintenance headaches
of more complicated strategies.
For repeatedly used images (the back
and home buttons atop this page, for example), a better strategy
is to keep common graphics & images in a separate directory.
When the web pages are published, however, it is crucial for the
web page and image directories to have the same names and relative paths
from one to another, otherwise the images will not work. For this strategy, the "Leave image at the original location" option
needs to be checked (beneath the image URL or filename
in the Image Properties window) when adding a graphic to a page.
For this strategy, the "Leave image at the original location" option
needs to be checked (beneath the image URL or filename
in the Image Properties window) when adding a graphic to a page.
Remember that unless you created an image, or you were explicitly
given permission, you probably do not have the copyright permission needed
to include it on web pages you publish.
Image Properties
The basic properties of an image include its:
L-DoubleClick on an image to bring up the Image Properties window.
filename or URL
If the image to include on a page is on the local computer, click the Choose
File button and navigate the filesystem to find it. If the image
resides on some remote computer, enter the URL of the image in the box.
to retrieve it.
Composer's default action is to save a copy of the image in the same
directory as the HTML file. Read more about
when this strategy is reasonable and when it is
appropriate to check the "Leave image at the original location"
option.
alignment & placement
This attribute has its own page of text/image
alignment examples.
dimensions
Typically, an image is included at its original dimensions. The
Height and Width attributes, though, tell the browser exactly
how much space to reserve for the image, and these can be changed to whatever
is desired. Image quality is best at an image's original dimensions.
| Original Size
( 141 x 92 pixels )

|
Custom Size
Height = 100
Width = 92
On a Short Day... |
Custom Size
Height = 141
Width = 72
On a Thin Day... |
It's tempting to use these attributes to enlarge an image. However,
the detail in an image is not changed, so if enlarged too much, the image
begins to look boxy and grainy...
Original Size
( 32 x 32 pixels )

|
Custom
Size
(enlarged 3x)
Height = 96
Width = 96 |
space around image
Adding space around an image keeps it from crowding neighboring objects.
Specify a non-zero number to give images some breathing room; set this
number to zero for adjacent images to touch each other.
Left and Right space: 0 (pixels)
Top and bottom space: 0 (pixels)
The text is placed close to the image, by default, as shown here:
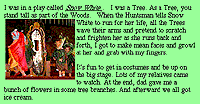 |
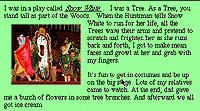
Left and Right space: 8 (pixels)
Top and bottom space: 8 (pixels)
Adding space to the left/right and top/bottom gives the image some breathing
room.
 |
solid border
Rectangular pictures can be set off from the page's background by using
a solid border. However, pictures and graphics with a transparent
background (like the globe) may look awkward with a border.
Adding an Image to a page
If the image has a file icon easily at hand:
-
Drag icon onto page and drop where desired
(L-DoubleClick on the image to change its default properties).
Otherwise:
-
L-Click on the page where the image is to be placed;
-
Toolbar: click the Image button
-or- Menubar: Insert, select Image...
-
Choose the image filename or specify its URL;
-
Modify any properties, as appropriate, and click OK.
Deleting an Image from a page
L-Click on image to select it; then use the DELETE
key or CUT it out.
Changing the properties of an
Image
Properties of an image are specified in a separate window. To get
to this window:
-
L-DoubleClick on the image.
=OR=
-
R-Click anywhere on the image: select Image Properties
=OR=
-
L-Click on the image to select it; then
-
Toolbar: click the Image button
-or- Menubar: Format, select Image
Properties
Then, modify the values of the Image Properties...
pages by Stewart Crawford-Hines, ©
1998